Mini Spring Dessert Tarts (With a No Bake Cheesecake Filling)


Published on March 19, 2026
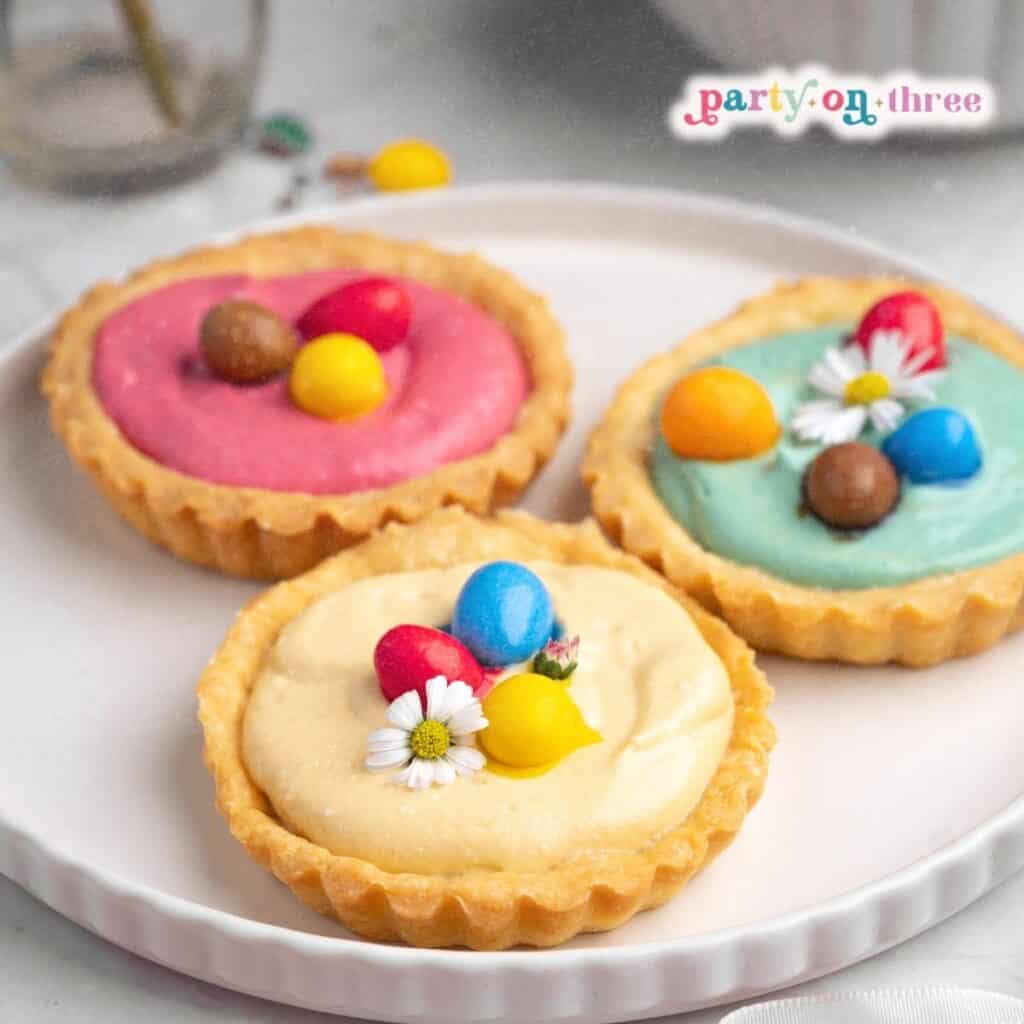
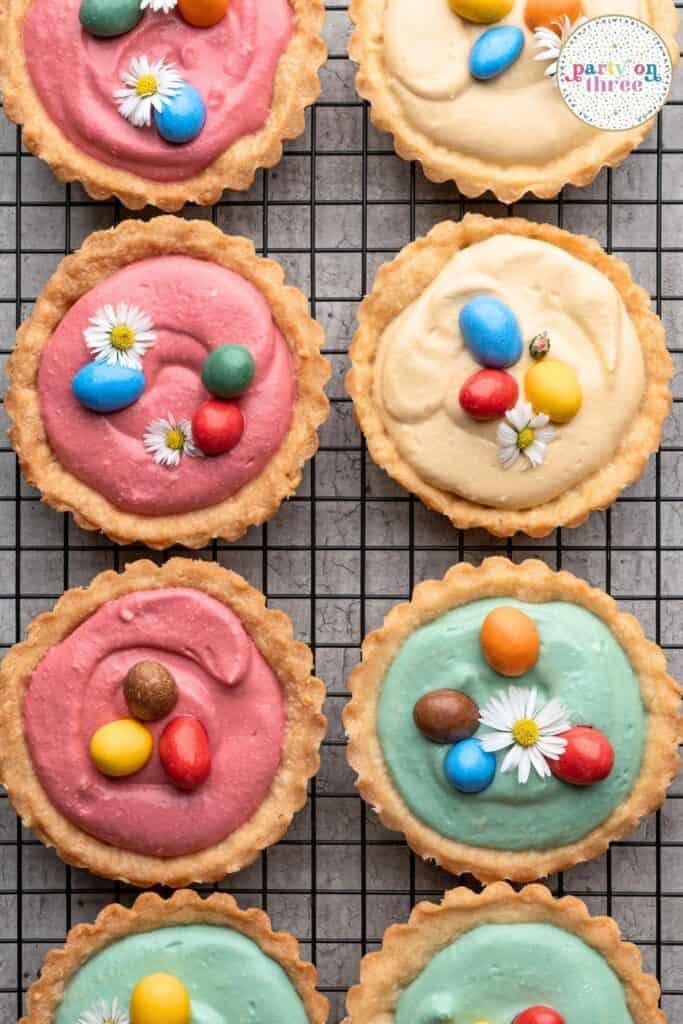
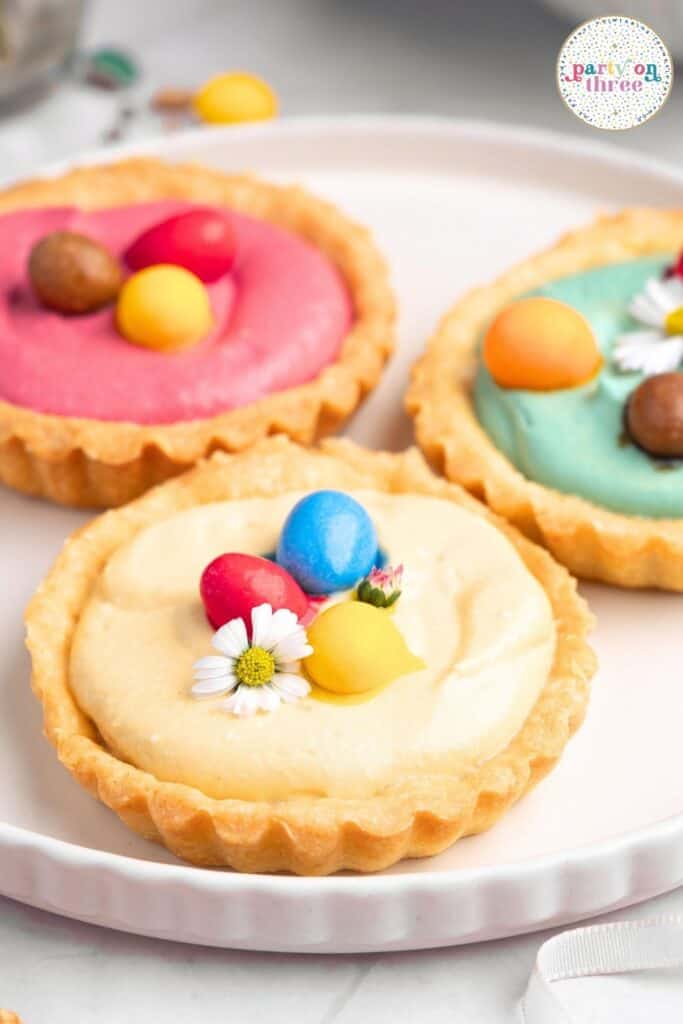
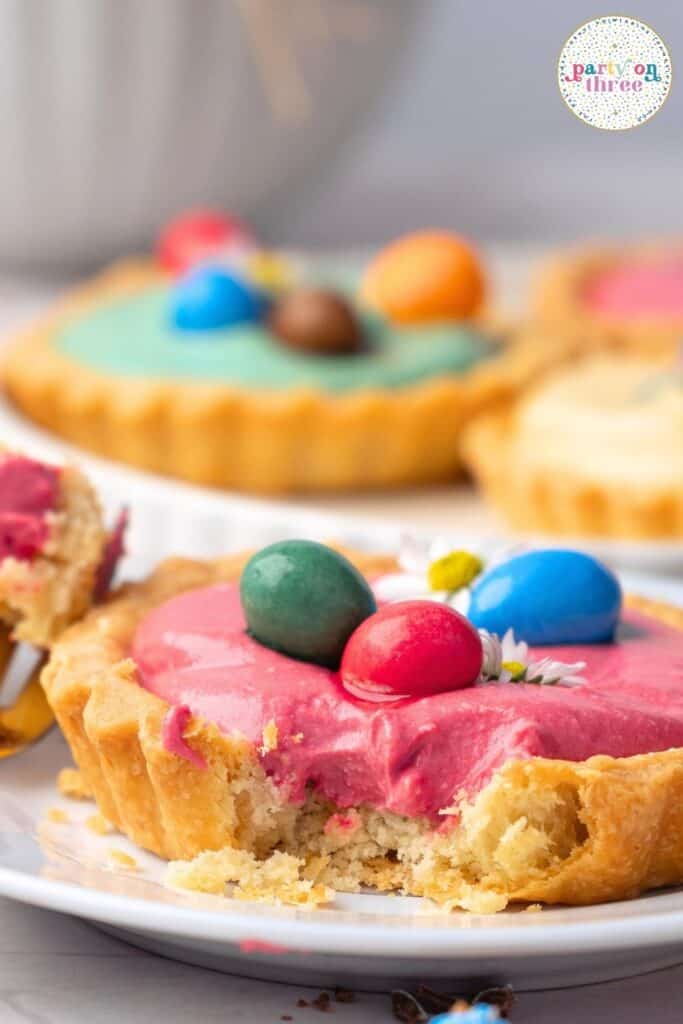
These mini spring dessert tarts combine buttery pastry shells with a light, creamy no-bake cheesecake filling, making them a great choice for Easter or spring parties. You can easily customize each tart with pastel colors and fun toppings like mini chocolate eggs or edible flowers, so your dessert table looks beautiful. Since they’re individual desserts, everyone gets their own portion, so you don’t have to worry about messy slicing or a big cleanup later.
Love Party on Three?
Make us your preferred source on Google so our recipes, printables, and party ideas show up first when you search. One tap and you're set, it's free and it helps us so much.
There are affiliate links in this post – please read my full disclosure policy. As an Amazon Associate, I earn from qualifying purchases.
This easy cheesecake recipe is great for entertaining because you can prepare most of it ahead of time. The shells bake nicely and keep their shape, and the filling only needs a few ingredients and a mixer. You can put everything together the day before your party and just add the finishing touches before your guests arrive. The tarts look impressive, but the steps are simple, even if you don’t usually bake pastry.
Spring tarts are perfect for Easter brunch, spring baby showers, Mother’s Day, or even a weekend baking project with kids who enjoy picking out pastel colors. The lemon-flavored filling is light and refreshing, so they’re great for warm weather and won’t feel too heavy after a meal. If you’re planning a full spring menu, these go well with Easter cupcakes and also pair nicely with savory starters like ham and cheese sliders.
What You Need for Perfect Spring Cheesecake Tarts
All-Purpose Flour: Regular all-purpose flour works great here for a tender but sturdy pastry shell that holds its shape beautifully.
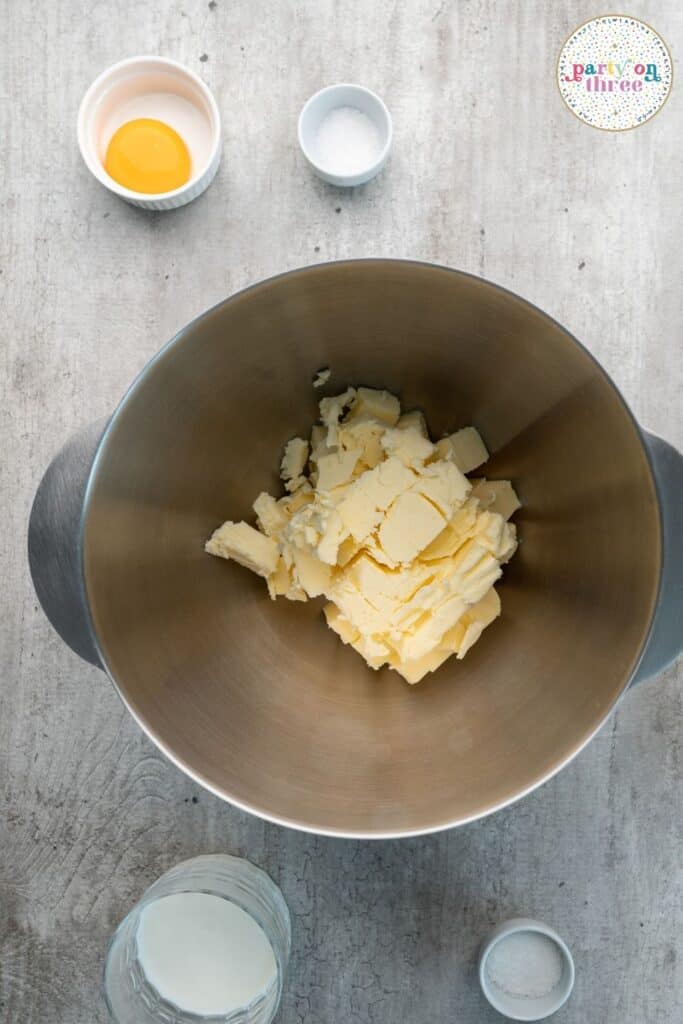
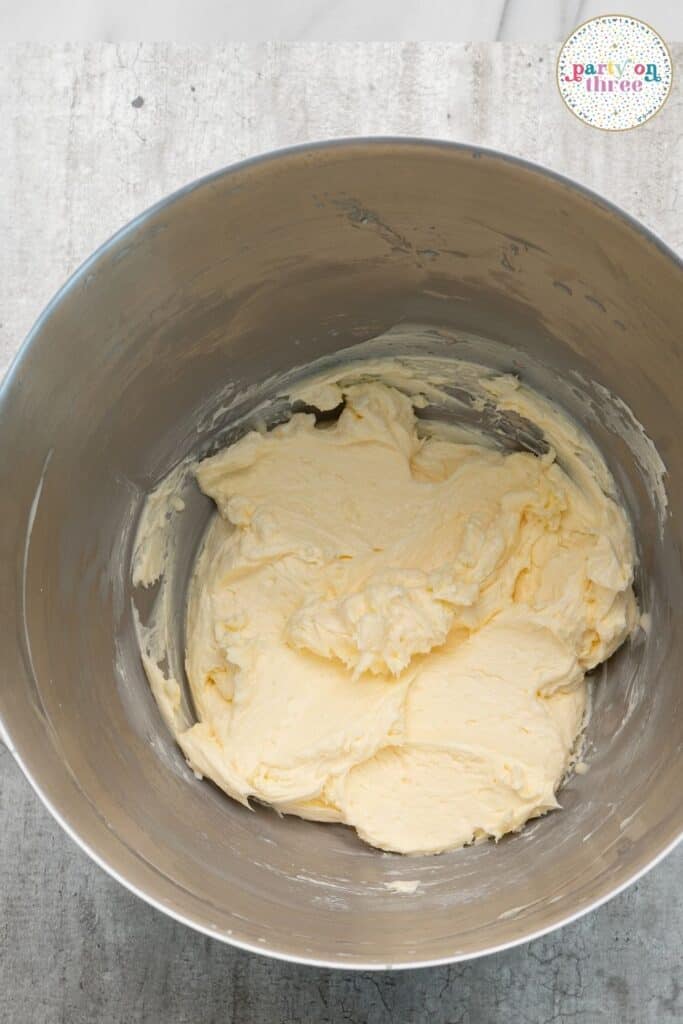
Unsalted Butter: Make sure it’s truly at room temperature so it blends smoothly into the dough without any lumps.
Egg Yolk: Just one yolk enriches the pastry and gives it that gorgeous golden color when baked.
Whole Milk: Room temperature milk helps everything come together into a smooth dough without overworking it.
Cream Cheese: This needs to be fully softened so your filling stays silky and lump-free.
Fresh Lemon Juice: A little bright citrus cuts through the richness and gives the filling that perfect springtime freshness.
Powdered Sugar: Dissolves easily into the cream cheese for a smooth, sweet filling without any graininess.
Heavy Cream: Whipped into soft peaks, this makes the filling light and airy instead of dense.
Vanilla Extract: Pure vanilla adds warmth and rounds out all the flavors beautifully.
Gel Food Coloring: A tiny drop creates those pretty pastel shades without thinning out your filling like liquid coloring can.
Mini Chocolate Eggs or Edible Flowers: Your finishing touch that makes these look absolutely party-ready.
How to Make Mini Spring Dessert Tarts
Combine softened butter, salt, egg yolk, sugar, and milk in a large bowl and mix until completely smooth and creamy.
Gradually add the flour and mix just until the dough comes together in a ball, being careful not to overmix.
Turn the dough out onto a floured surface, knead gently for about one minute, then flatten into a disk, wrap tightly in plastic, and refrigerate for at least 2 hours.
Preheat your oven to 350°F and generously butter eight 4-inch tart pans.
Roll the chilled dough out on a floured surface to about ¼-inch thickness, cut circles slightly larger than your pans, and press gently into each pan, trimming excess.
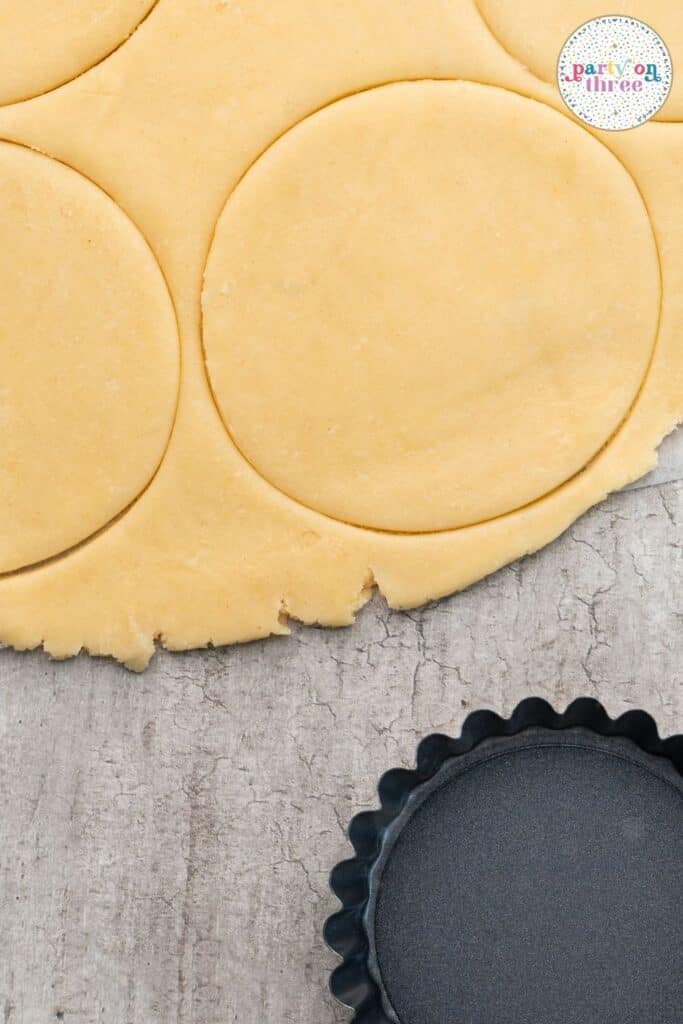
Line each shell with parchment paper, fill with pie weights or dried beans, prick the bottoms with a fork, and place on a baking sheet.
Bake for about 30 minutes until lightly golden, then remove from oven and let cool completely on a wire rack.
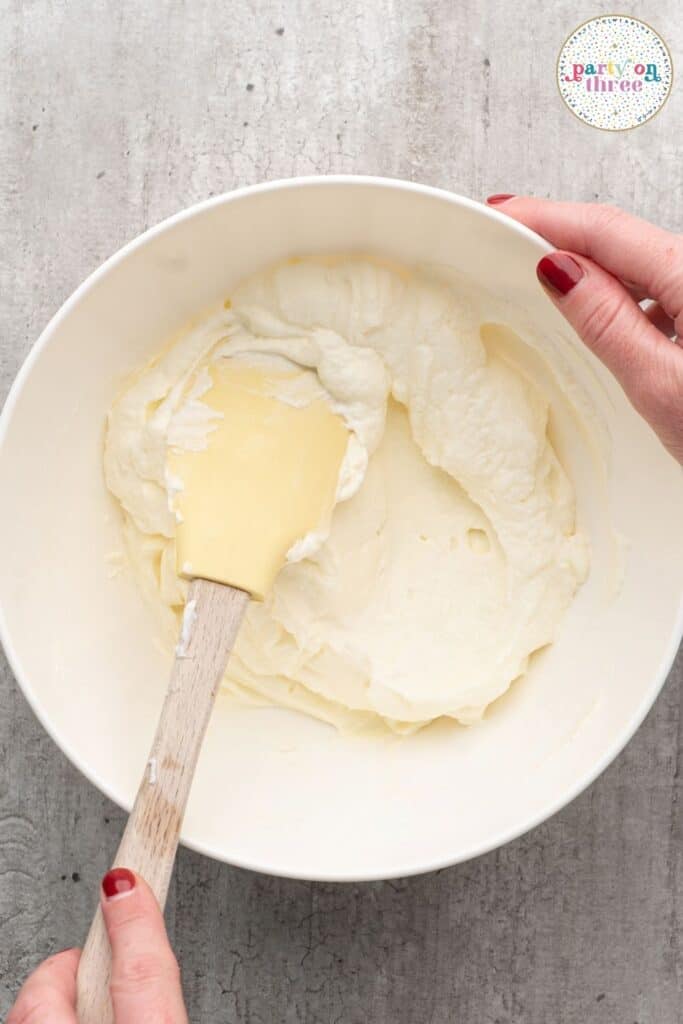
Beat together cream cheese, lemon juice, and powdered sugar in a medium bowl until perfectly smooth.
In a separate bowl, whip the heavy cream with vanilla extract until soft peaks form.
Gently fold the whipped cream into the cream cheese mixture until fully combined and fluffy.
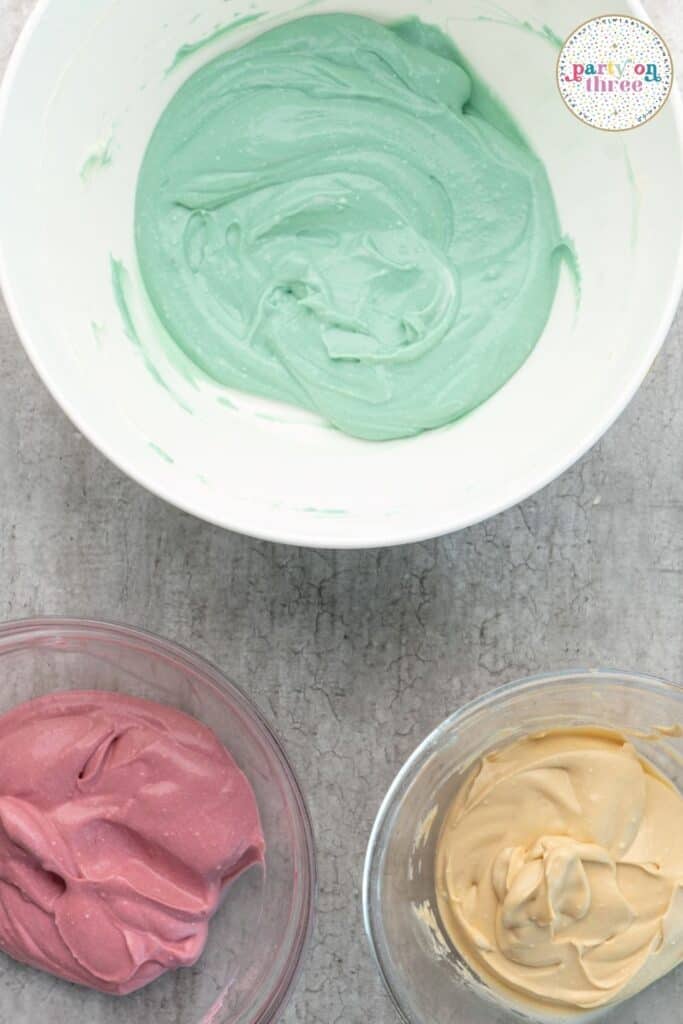
Divide the filling into separate bowls and add a drop of gel food coloring to each, mixing until you achieve your desired pastel shades.

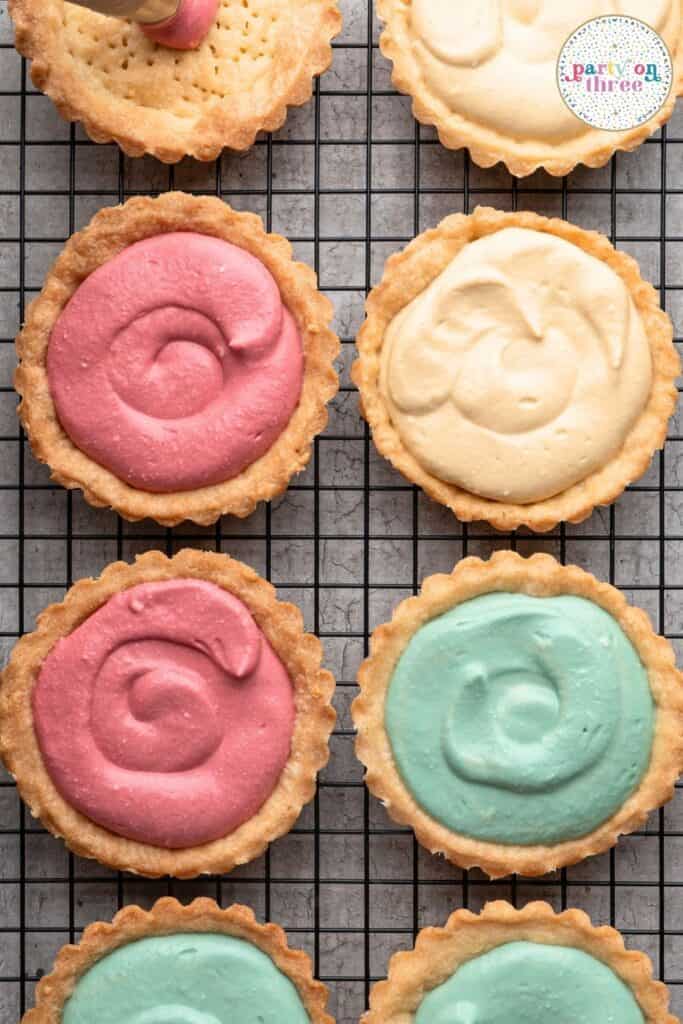
Spoon or pipe the colored filling into each cooled tart shell, filling almost to the top.
Refrigerate the filled tarts for at least 2 hours to set up completely.
Just before serving, top each tart with mini chocolate eggs or fresh edible flowers for a beautiful finishing touch.
Tips for Making These Individual Tarts
Make Ahead:
- The pastry dough can be made up to 2 days ahead and kept wrapped tightly in the fridge, or frozen for up to a month.
- Baked shells store beautifully at room temperature in an airtight container for 2 days before filling.
- Fully assembled tarts can be made the day before and refrigerated, just wait to add the garnishes until right before serving.
Storage:
- Store filled tarts covered in the refrigerator for up to 3 days.
- The shells can get slightly softer over time, so these are best enjoyed within the first day or two for optimal texture.
- Unfilled baked shells can be frozen for up to 2 months and thawed at room temperature when you’re ready to fill them.
Ways to Customize Your Mini Tartlets
Crust Variations: You can swap the homemade pastry for store-bought tart shells or even graham cracker crusts if you want to save time.
- Mini phyllo cups from the freezer section work in a pinch for an even faster version.
- For gluten-free guests, use a gluten-free flour blend in a 1:1 ratio for the pastry dough.
Filling Flavor Swaps: Add different extracts like almond or orange to the filling for a fun flavor twist.
- A tablespoon of berry puree folded into the filling creates natural color and fruity flavor.
- Swap half the cream cheese for mascarpone for an even lighter, silkier texture.

Topping Ideas: Fresh berries like raspberries, blueberries, or sliced strawberries make gorgeous natural decorations.
- A drizzle of white chocolate or a dusting of powdered sugar adds an elegant touch.
- Crushed freeze-dried fruit gives you bright color and concentrated flavor without adding moisture.
- Lemon zest curls or candied citrus peel add sophistication for adult gatherings.
Size Options: Mini muffin tins work great for bite-sized versions that are perfect for larger parties.
- You can also make one large 9-inch tart and slice it, though individual portions are easier for serving.
- Reduce baking time to about 15-20 minutes if you’re making tiny tartlets.
Dairy-Free Version: Coconut cream whips up beautifully as a replacement for heavy cream.
- Use dairy-free cream cheese alternatives, though the texture will be slightly different.
- Make sure to chill everything really well since dairy-free versions can be softer.
These mini spring dessert tarts are the kind of recipe that makes entertaining feel totally doable and fun. They look beautiful, taste incredible, and give you so much flexibility to make them your own with different colors and toppings. Your guests are going to love having their own personal dessert, and you’re going to love how simple they are to pull together. Make a batch this weekend and watch them disappear!
Common FAQs
Absolutely! You can use a muffin tin and just press the dough into each cup to create rustic free-form shells. They won’t have the classic fluted edges but they’ll taste just as delicious. You can also use a regular pie pan to make one large tart and slice it into wedges.
This usually happens when the dough wasn’t chilled long enough or was overworked during rolling. Make sure you give it the full 2 hours in the fridge, and when you press it into the pans, let it relax for another 15 minutes in the freezer before baking. The pie weights also help hold the shape, so don’t skip that step.
A piping bag makes this so much easier and gives you a really polished look. If you don’t have one, just use a ziplock bag with the corner snipped off. You can also carefully spoon it in, but piping gives you more control and creates those pretty swirls on top.
You can, but gel is really the better choice here because liquid coloring can thin out your filling and make it too soft to hold its shape. If you only have liquid, use it very sparingly, just a drop or two, and expect a slightly softer texture.
Yes, because of the cream cheese filling, these should stay chilled until you’re ready to serve them. You can take them out about 15 minutes before serving if you prefer them slightly less cold, but they should go back in the fridge for any leftovers right away.

Individual Spring Dessert Tarts

Ingredients
- 4 cups pastry flour, plus extra for dusting
- 1 ⅔ cups unsalted butter, at room temperature
- 1 teaspoon salt
- 1 large egg yolk
- 2 teaspoons sugar
- 7 tablespoons whole milk, room temperature
- 12 oz cream cheese, softened at room temperature
- 4 teaspoons fresh lemon juice
- ½ cup powdered sugar
- ½ cup (≈120 mL) heavy cream
- 1 teaspoon vanilla extract
- 1 drop gel food colouring of your choice
- Optional: small Easter chocolate eggs or edible flowers to garnish
Instructions
- Mix softened butter, salt, egg yolk, sugar, and milk until smooth, then gradually add flour until dough forms.
- Knead dough briefly, wrap, and chill for 2 hours.
- Roll out dough, cut circles, press into buttered 4-inch tart pans, and trim excess.
- Line with parchment, add pie weights, prick bottoms, and bake at 350°F for 30 minutes until golden.
- Cool shells completely on a wire rack.
- Beat cream cheese with lemon juice and powdered sugar until smooth.
- Whip heavy cream with vanilla to soft peaks, then fold into cream cheese mixture.
- Divide filling, tint with gel food coloring, and spoon into cooled shells.
- Refrigerate 2 hours, then garnish with chocolate eggs or edible flowers before serving.